


Every wildfire season, I get calls from homeowners across San Diego and Los Angeles asking the same question: “How do I install ember resistant vents?” It’s one of the most common questions we hear at Ember Pro USA, and it’s a good one. Your vents are one of the most vulnerable entry points on your home during a wildfire. Embers can travel over a mile ahead of the fire front, and if they find their way through a standard vent with quarter-inch mesh, they can ignite your attic, crawl space, or wall cavity from the inside out.
I’m Ryan Kresan, COO and co-founder of Ember Pro USA, and I’ve personally inspected hundreds of homes throughout Southern California’s fire-prone communities. In this guide, I’ll walk you through everything you need to know about installing ember resistant vents — from understanding the different vent types to the step-by-step process, the tools you’ll need, and why professional installation often makes the difference between passing inspection and a costly do-over.
Not sure which step to prioritize first? Our wildfire risk calculator shows your CAL FIRE zone and exposure level — so you know exactly where to start.
Why Your Standard Vents Are a Wildfire Liability
Most homes in Southern California were built with standard ventilation that uses quarter-inch screening. That was fine for keeping out birds and large debris, but it does almost nothing to stop burning embers. During a wildfire, wind-driven embers as small as a grain of rice can pass through those openings and land on the combustible materials inside your attic or crawl space — insulation, stored cardboard boxes, old clothing, wood framing. Once ignition starts inside the structure, the home is usually lost.
California’s Chapter 7A Building Code specifically addresses this problem. If your home is in a Wildland-Urban Interface (WUI) zone — and that includes large portions of San Diego, Los Angeles, Orange County, and Riverside County — you’re required to have ember resistant vents that meet current fire-hardening standards. Even if you’re not currently in a designated WUI zone, upgrading your vents is one of the smartest, most cost-effective wildfire home defense investments you can make.
Understanding the Types of Vents on Your Home
Before you start any vent installation or retrofit project, you need to know what you’re working with. Most homes have several types of vents, and each one requires a different approach.
Attic and Roof Vents
These include ridge vents along the peak of your roof, turbine vents, and static roof vents. They’re your attic’s primary exhaust system. During a wildfire, they’re exposed to the highest concentration of airborne embers because of their elevated position. Ridge vents should be rated to resist wind-driven rain and feature an external baffle. Turbine vents need 1/8-inch stainless steel mesh attached to the underside of the roof sheathing at minimum.
Eave and Soffit Vents
Under-eave vents are inlet vents that draw fresh air into the attic. They’re particularly vulnerable because embers naturally collect in the horizontal channels beneath eaves. A covered soffit design is ideal here — it creates a physical barrier that makes it harder for embers to reach the vent opening. This is one area where I strongly recommend professional installation because improper soffit vent work can compromise your roof’s ventilation balance.
Foundation and Crawl Space Vents
These sit low on your home’s perimeter and ventilate the space beneath your floor. They’re at risk from ground-level embers and radiant heat from burning vegetation or debris near the foundation. Foundation vent replacements are generally the most straightforward for a homeowner to handle, but proper sizing and sealing are critical.
Gable Vents
Gable vents are the large, often decorative vents on the triangular wall section at the end of your roof. They can be significant ember entry points due to their size. Replacing or retrofitting gable vents typically requires working at height and ensuring the new vent integrates properly with your siding and trim — another spot where professional help saves headaches.
Household Exhaust Vents
Don’t overlook your dryer vent, stove hood exhaust, and water heater vents. These penetrations through exterior walls are often forgotten during hardening projects. Use noncombustible 1/8-inch stainless steel screening where appropriate, but be careful with dryer vents — mesh can trap lint and create its own fire hazard if not maintained. Vent guards designed for dryer applications are a better solution than standard mesh.
What Makes a Vent “Ember Resistant”?
Not all “fire rated” vents are created equal. Here’s what to look for when selecting ember resistant vents for your home:
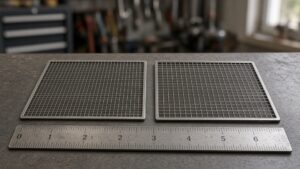
Mesh size: The screening must be 1/8-inch or smaller. Some premium vents use 1/16-inch mesh for maximum protection. Standard quarter-inch mesh does not meet current code in WUI zones.
Material: Stainless steel is the gold standard. Galvanized steel and copper are also acceptable. Never use fiberglass or plastic mesh — it melts under radiant heat and defeats the entire purpose.
Design features: Look for vents with built-in baffles, intumescent coatings (materials that swell when exposed to heat, sealing the opening), or honeycomb patterns. The best vents combine multiple ember-blocking features rather than relying on mesh alone.
Certifications: Make sure any vent you purchase is tested and certified to meet California’s Chapter 7A requirements. Products from manufacturers like Brandguard, Vulcan, and O’Hagin are engineered specifically for WUI compliance. If a vent doesn’t have a clear WUI certification, don’t install it.
Editor’s note: Your insurance situation depends heavily on your property’s actual fire exposure. Our free risk assessment factors in official CAL FIRE data to show what your risk level actually is — useful context before talking to your carrier.
How to Install Ember Resistant Vents: Step-by-Step
I want to give you a realistic picture of what vent installation involves. Some homeowners can handle basic foundation vent swaps, but the full scope of a home vent upgrade usually involves working at height, understanding airflow dynamics, and ensuring code compliance.
Tools and Materials You’ll Need
- Tape measure
- Reciprocating saw or tin snips
- Drill/driver with appropriate bits
- Pry bar (for removing old vents)
- Caulk gun with fire-rated sealant
- 1/8-inch stainless steel mesh (for retrofit approach)
- Replacement ember resistant vent units (sized to your existing openings)
- Corrosion-resistant screws
- Safety equipment: ladder, gloves, eye protection, dust mask
Option 1: Retrofit Mesh Over Existing Vents
This is the budget-friendly approach and works well for homeowners who want improved protection without full vent replacement.
- Measure your existing vent openings carefully. You need 1/8-inch stainless steel mesh cut to overlap the opening by at least one inch on all sides.
- Clean the area around each vent. Remove any debris, cobwebs, old caulk, or deteriorated screening.
- Inspect the existing vent frame for damage, rot, or gaps. Seal any cracks with fire-rated caulk before installing mesh. If the frame itself is damaged, you’ll need to move to a full replacement.
- Cut your mesh to size using tin snips. Wear gloves — stainless steel mesh edges are sharp.
- Secure the mesh over the existing vent using corrosion-resistant screws spaced every 4-6 inches around the perimeter. The mesh should sit flat against the vent frame with no gaps or bulges.
- Seal the edges with fire-rated caulk to prevent embers from getting behind the mesh.
This approach is a solid improvement, but keep in mind: layering mesh over existing quarter-inch screening reduces airflow. If your attic ventilation is already marginal, this can cause moisture problems, ice damming in cooler climates, or excessive heat buildup. That’s why I always recommend a ventilation assessment before retrofitting.
Option 2: Full Vent Replacement
For the best protection and proper code compliance, full replacement with purpose-built ember resistant vents is the way to go.
- Identify all vent locations on your home. Walk the perimeter, check the roofline, inspect the attic from inside, and look under the house. Most homes have 15-30 individual vents — more than most people expect.
- Measure each opening precisely. Vent openings are not always standard sizes, especially in older homes. You’ll need exact measurements to order the right replacement units.
- Order the correct vents. Match each opening type — foundation, eave, soffit, ridge, gable — with the corresponding ember resistant product. Don’t try to make a foundation vent work in a soffit opening.
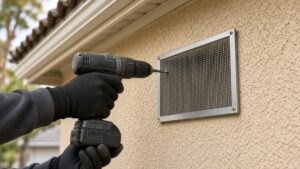
- Remove the old vent. Use a pry bar to carefully extract the existing vent. For screwed-in vents, back out all fasteners first. For vents set in stucco or siding, you may need to cut around the perimeter with a reciprocating saw to free the unit without damaging the surrounding material.
- Prepare the opening. Clean out old caulk, debris, and any damaged framing. If the rough opening is oversized, add blocking to bring it to the correct dimensions for your new vent.
- Install the new vent. Set the unit into the opening, check that it’s level, and secure with corrosion-resistant screws. Follow the manufacturer’s fastener spacing recommendations.
- Seal all edges with fire-rated sealant. No gaps. This is where I see the most mistakes on DIY installations — people get the vent in but leave quarter-inch gaps around the perimeter that defeat the entire upgrade.
- Verify airflow. After installation, check that air moves freely through the vent. A vent that’s sealed too tightly or installed backward won’t ventilate properly.
Common Installation Mistakes I See on Inspections
After years of performing wildfire home inspections across Southern California, I’ve seen a lot of well-intentioned vent upgrades that fall short. Here are the most common problems:
Leaving gaps around vent perimeters. This is number one. The vent itself might be perfect, but if there’s a quarter-inch gap between the vent frame and the wall, embers will find it. Every edge needs to be sealed with fire-rated caulk or sealant.
Using the wrong mesh material. I’ve pulled fiberglass screening off “upgraded” vents that melted during heat tests. If it’s not stainless steel, galvanized steel, or copper, it doesn’t count.
Ignoring airflow balance. Your attic needs a specific ratio of intake to exhaust ventilation. Slapping mesh over every opening without calculating net free area can lead to moisture damage, mold, and premature roof failure. This is where most DIY projects run into trouble.
Missing vents entirely. The average homeowner finds about two-thirds of their vents on their own. The rest are hidden behind soffits, tucked into dormers, or obscured by landscaping. A professional inspection catches every one.
Not pulling permits. In many jurisdictions across San Diego and LA County, vent replacements in WUI zones require a building permit. Installing without one can cause problems when you sell your home or file an insurance claim.
Why Professional Installation Matters
I’ll be straight with you — my co-founder Jim Sprouse and I started Ember Pro USA because we saw too many homeowners struggling with wildfire hardening projects that looked simple on paper but got complicated fast. Here’s why we recommend professional installation for most vent upgrade projects:
Code compliance. California’s wildfire building codes are detailed and vary by jurisdiction. A professional installer knows exactly which products meet code in your specific area and can ensure the installation passes inspection the first time. Our team works under CSLB License #1142407 — we’re licensed, insured, and accountable for every installation.
Proper fit and airflow. We calculate net free area for every home to ensure vent upgrades don’t compromise ventilation performance. That math involves your attic square footage, roof pitch, existing exhaust capacity, and local climate factors. Get it wrong and you trade ember protection for moisture damage.
Warranty protection. Most ember resistant vent manufacturers require professional installation for their warranty to apply. A DIY installation that fails could leave you without coverage when you need it most.
Complete coverage. We inspect every penetration on your home — not just the obvious vents. That includes utility penetrations, gaps in siding, unsealed pipe entries, and any other opening where embers could enter. A comprehensive approach is the only approach that actually works.
Insurance documentation. After our installations, we provide detailed documentation of every upgrade. Many insurance carriers offer premium discounts for homes with verified wildfire hardening improvements, and our paperwork makes it easy to file for those savings.
What a Professional Vent Installation Costs
Vent upgrades are one of the most affordable wildfire defense investments. A full-home ember resistant vent replacement typically runs between $2,000 and $6,000 depending on the number of vents, accessibility, and vent types needed. Compare that to the cost of losing your home — or even the cost of a single denied insurance claim — and the math is clear.
We offer free 10-point wildfire home inspections that include a detailed assessment of every vent on your property, along with a prioritized action plan. If vents are your most urgent need, we’ll tell you. If there are bigger vulnerabilities to address first, we’ll tell you that too. No sales pressure — just honest assessment from people who’ve been doing this work across San Diego, Los Angeles, Orange County, and Riverside County for years.
Maintaining Your Ember Resistant Vents
Installation isn’t the end of the job. Ember resistant vents need regular maintenance to stay effective:
- Inspect annually — check every vent for damage, corrosion, holes, or deterioration. The finer mesh in ember resistant vents can be damaged by impacts or animal activity more easily than standard screening.
- Clear debris — remove leaf litter, cobwebs, and dirt from vent surfaces. Accumulated organic debris near vents is fuel waiting for an ember.
- Clean dryer vent mesh — if you’ve added screening to your dryer exhaust, check it monthly for lint buildup. Restricted dryer airflow is a fire hazard in its own right.
- Clear combustibles from attics and crawl spaces — even the best vent is compromised if there’s a pile of old newspapers sitting three feet behind it inside your attic.
- Document everything — keep records of your vent types, installation dates, and inspection results. This documentation is valuable for insurance purposes and resale.
Get Your Vents Assessed by Ember Pro USA
Whether you’re considering a DIY retrofit or want a professional team to handle everything, the first step is knowing exactly what your home needs. Our free 10-point wildfire home inspection covers every vent on your property, plus nine other critical vulnerability areas.
Jim and I built Ember Pro USA to make wildfire defense accessible and straightforward for Southern California homeowners. We serve San Diego, Los Angeles, Orange County, and Riverside County, and every installation is backed by our CSLB License #1142407.
Ready to get started? Contact our team or call us at (858) 939-9345 (San Diego) or (310) 499-4891 (Los Angeles). We’ll schedule your free inspection and give you a clear plan for protecting your home.
Frequently Asked Questions
Can I install ember resistant vents myself?
Basic foundation vent replacements and mesh retrofits are manageable for handy homeowners. However, eave, soffit, roof, and gable vent installations require working at height, understanding airflow calculations, and ensuring code compliance. Most vent manufacturers also require professional installation for warranty coverage. We recommend at minimum getting a professional assessment before starting any DIY vent work.
What size mesh do I need for ember resistant vents?
California’s Chapter 7A Building Code requires mesh openings of 1/8-inch or smaller for WUI zone compliance. Some premium vents use 1/16-inch mesh for maximum ember protection. Standard 1/4-inch mesh does not meet current wildfire building codes. The mesh must be made from noncombustible material — stainless steel, galvanized steel, or copper. Never use fiberglass or plastic mesh, as it melts under heat exposure.
How many vents does a typical home have?
Most homes have between 15 and 30 individual vents, including attic vents, ridge vents, soffit or eave vents, foundation vents, gable vents, and household exhaust vents for dryers, stoves, and water heaters. During our free 10-point wildfire home inspections, we frequently find vents that homeowners didn’t know existed — hidden behind soffits, inside dormers, or obscured by landscaping.
Do I need a permit to replace vents in California?
In many California jurisdictions, vent replacements in Wildland-Urban Interface (WUI) zones require a building permit, especially if the work involves structural modifications or changes to the ventilation system. Permit requirements vary by city and county. Installing without the required permits can cause issues during home sales, insurance claims, or future inspections. Ember Pro USA handles all permitting as part of our professional installation service.
How much does it cost to replace all the vents on my home with ember resistant vents?
A full-home ember resistant vent replacement typically costs between $2,000 and $6,000, depending on the number of vents, vent types, accessibility, and your home’s specific requirements. This is one of the most affordable wildfire hardening upgrades available. Ember Pro USA offers free 10-point wildfire home inspections that include a detailed vent assessment and cost estimate.
What’s the difference between retrofitting mesh and replacing the entire vent?
Retrofitting involves adding 1/8-inch stainless steel mesh over your existing vents. It’s less expensive and provides improved ember protection, but it reduces airflow and may not meet code requirements in all jurisdictions. Full vent replacement installs purpose-built ember resistant units engineered for both fire protection and proper ventilation. Full replacement provides better protection, maintains airflow, meets code, and qualifies for manufacturer warranties.
Will ember resistant vents reduce my homeowners insurance premium?
Many insurance carriers offer premium discounts for verified wildfire hardening improvements, including ember resistant vent installations. The discount varies by carrier and the scope of your overall hardening work. Ember Pro USA provides detailed documentation of all installations, which you can submit to your insurer. Some homeowners in high-risk areas have seen annual savings that offset the installation cost within a few years.
How often should I inspect my ember resistant vents?
Inspect all vents at least once per year, ideally before fire season. Check for damage, corrosion, holes, and debris accumulation. The finer mesh used in ember resistant vents can be more susceptible to damage from impacts or animal activity. Dryer vent screening should be checked monthly for lint buildup. Clear all organic debris such as leaves, cobwebs, and dirt from vent surfaces, and remove combustible materials stored near interior vent openings in attics and crawl spaces.
Does Ember Pro USA serve areas outside San Diego?
Yes. Ember Pro USA serves San Diego, Los Angeles, Orange County, and Riverside County. Our San Diego office can be reached at (858) 939-9345 and our Los Angeles line is (310) 499-4891. We offer free 10-point wildfire home inspections throughout our service area. Contact us to schedule yours.
Curious about your property’s actual wildfire risk? Our free calculator shows your CAL FIRE zone, exposure level, and recommended next steps based on your address.
Get your free risk score
Leave a Reply